Getting Started with Gumnut
This guide will walk you through the process of enhancing an existing project with Gumnut, a collaborative editor that drops in anywhere, makes your products stickier, easier-to-use, plus providing full character-level attribution and history over time through its powerful database layer.
Prerequisites
- A Node.JS dev environment
- npm (or your package manager of choice)
- A basic understanding of JavaScript and web components
You'll also need to sign up for a free account; head to the Gumnut Dashboard to make one.
The Example Site
We're going to add Gumnut's editing features to "Good Dogs with Gumnut", a one page VanillaJS app which you can clone from Gtihub:
git clone https://github.com/gumnutdev/good-dogs-demo.git && cd good-dogs-demo
npm install
npm run dev
TIP
If you want to skip this guide and see a working version, checkout the walkthrough-complete branch
Great, now our app is running at localhost:5173, and it'll live-reload when we save changes (thanks, Vite!)
The app consists of a pretty standard index.html page, some CSS, and an empty file called script.js, all served from the /src/ directory. Those are all we need to change; Gumnut is framework agnostic and requires almost no changes to your backend.
We're going to add Gumnut's editing features to all four sets of input:
The
dogNametext fieldThe
descriptiontext areaEach of the checkboxes under Winning Features (
floppyEars,boopableSnootandtoeBeans)The
goodDogRangesliderAdd
gumnut-focusto each element so we can see other users in the formgumnut-statusto see the connnection status of the page
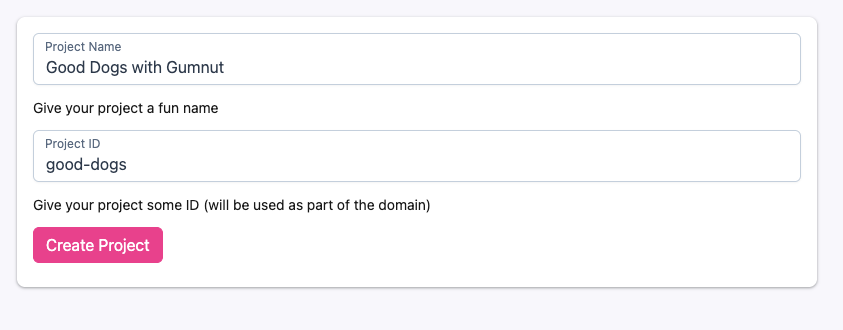
Projects in Gumnut
Everything in Gumnut connects to a Project - which can contain a collection of Documents. First we need an account and create a new project.
API Keys and Tokens
In order to edit a document, you need two kinds of access credentials:
- Firstly, an API key to connect to the Gumnut API
- Secondly, a token for each user which edits
Let's generate the first one now by logging in to the Gumnut dashboard and clicking on "API Keys", then "(local) dev key ✅".
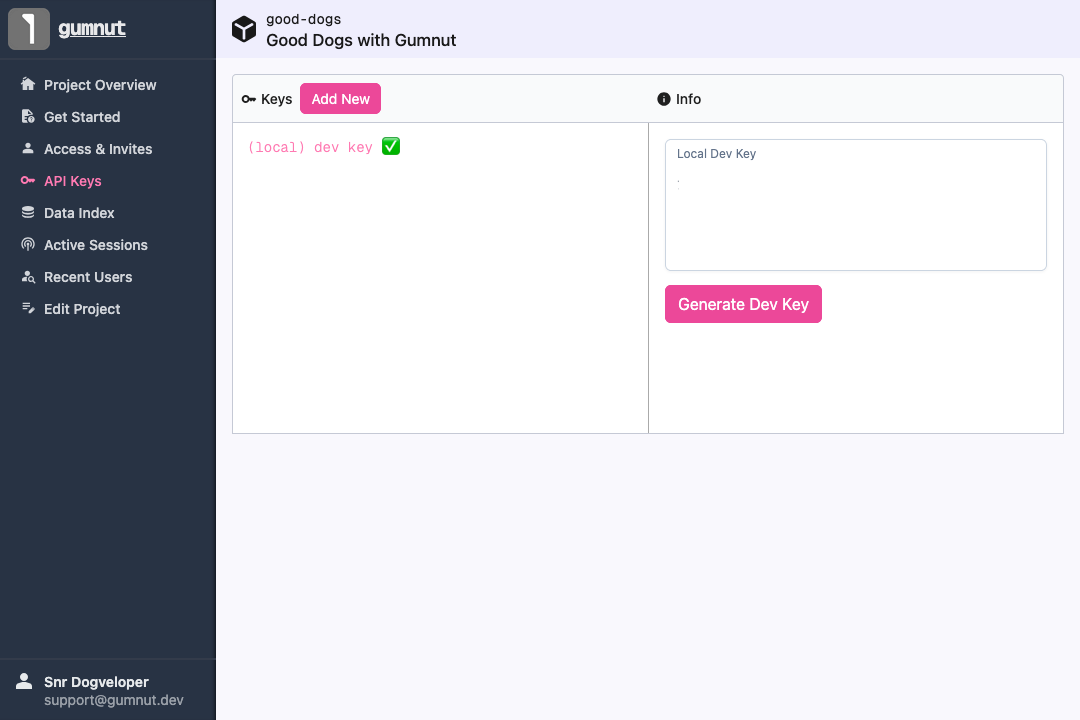
Click "Generate API Key" and copy the value from the "Local Dev Key" field; we'll need it in Step 1, below.
Installation
Install the Gumnut package using npm (or your package manager of choice):
npm install @gumnutdev/apiTIP
Gumnut follows Semantic Versioning and is under rapid development; You might want to pin a specific version during the beta.
1. Configure Gumnut
The first think we need to do is configureGumnut, we need: host server, the projectId, and the apiKey. We can add all our necessary imports and configure Gumnut at the top of client.js.
We also need to import the Gumnut DOM elements.
import {
  configureGumnut,
  connectToGumnutDoc,
  buildTestToken,
} from "@gumnutdev/api";

// import the DOM elements so <gumnut-text> etc. work in the HTML
import "@gumnutdev/api/dom";

configureGumnut({
  projectId: "your-project-id",
  localDevKey: "your-api-key", // Paste your Local Dev Key here
});
This should connect to your Gumnut project.
TIP
This function can be skipped if you include these values as environment variables.
2. Authenticate and Connect
Next we connectToGumnutDoc to tell Gumnut we want to start tracking this document. This methods takes two parameters:
docId: A document ID which Gumnut will join (or create if it doesn't exist)getToken: A function which generates an authentication token
const gumnutDoc = connectToGumnutDoc({
  docId: "good-dogs",
  getToken: () =>
    // undefined here means create a unique user id for each connection
    // (so the same person appears as a different color)
    buildTestToken(undefined, {
      name: "Bandit Heeler",
      email: "bandit.h@gumnut.dev",
      // picture: base64 image will include a picture of the user
    }),
}).doc; // the doc here is important!

await gumnutDoc.ready;
Now, about that getToken property. Gumnut is designed to be totally transparent to users; there's nothing to install, no permissions to grant and no login required. Instead, Gumnut calls the function passed as getToken to retrieve unique user tokens.
In Production, these take the form of a JWT generated via your backend with a call to Gumnut's API. For development (and demo) purposes, we're using the completely insecure buildTestToken method instead. For more on how Authentication in Gumnut works, see the Authentication Guide.
WARNING
It's worth repeating: don't use buildTestToken in Production. Your security team will be sad and we'll have to charge you a lot of money if jerks on the Internet use it to cram your documents with nonsense.
Gumnut uses the parameters passed to buildTestToken to attribute (eg associated) changes to a specific user. The first parameter is the user's unique ID; the second parameter is an object containing the users details, which will be displayed to other users.
3. Working with Text Inputs using <gumnut-text>
For each input we want to collaborate on, we need a Node. Nodes are named properties that store a value your users can edit; Documents are made up of collections of Nodes. Each independent value needs its own Node, which Gumnut creates the first time it's used.
Let's start with the dogName field. We'll replace the existing element with the built-in <gumnut-text> web component; this will let us keep track of changes and also add a cursor showing where each connected user is editing.
<!-- Replace this -->
<input
  type="text"
  class="input"
  placeholder="Rover"
  id="dogName"
  name="dogName"
/>

<!-- With this -->
<gumnut-text class="input" placeholder="Rover" id="dogName" name="dogName" />
Next, create/retrieve a node from the Document, and associate it with the input field.
document.getElementById("dogName").model = gumnutDoc.root().value("dogName");That should be all you need to see it works! Let's check by opening a new tab and typing stuff.
Woohoo! 🥳
Next, let's do the same for the description textarea. The process is the same, except we need to add the multiline attribute to <gumnut-text>:
<!-- Replace this -->
<textarea
  name="description"
  placeholder="Dog-shaped with a dog aroma and a dog personality. Very good dog."
  ...
></textarea>

<!-- With this -->
<gumnut-text
  multiline
  name="description"
  placeholder="Dog-shaped with a dog aroma and a dog personality. Very good dog."
  ...
></gumnut-text>document.getElementById("description").model = gumnutDoc.root().value("description");And you're done. That's all it takes to start editing a field with Gumnut. Open the page in two browser windows and you should see changes in one window seamlessly replicate in the other.
4. Working with Other Inputs using <gumnut-data>
When a text value changes, we need to know what part of the value (eg, which characters) changed and indicate those changes with a cursor; this is what the <gumnut-text> element does for us. For other inputs, we only need to track changes to the value as a whole. That's where the <gumnut-data> element comes in. It wraps around input or select element with atomic values (eg, those which change from one value to another "all at once").
Let's use <gumnut-data> elements to track changes to the Winning Features checkboxes and the Good Dog range slider:
<gumnut-data id="floppyEars">
  <input class="checkbox" type="checkbox" name="floppyEars" checked />
</gumnut-data>

<gumnut-data id="boopableSnoot">
  <input class="checkbox" type="checkbox" name="Boopable Snoot" />
</gumnut-data>

<gumnut-data id="toeBeans">
  <input class="checkbox" type="checkbox" name="ToeBeans" />
</gumnut-data>

<gumnut-data id="goodDog">
  <input
    type="range"
    id="goodDog"
    name="goodDog"
    min="0"
    max="100"
    value="50"
  />
</gumnut-data>document.getElementById("floppyEars").model = gumnutDoc.root().value("floppyEars");
document.getElementById("boopableSnoot").model =
gumnutDoc.root().value("boopableSnoot");
document.getElementById("toeBeans").model = gumnutDoc.root().value("toeBeans");
document.getElementById("goodDogRange").model =
gumnutDoc.root().value("goodDogRange");5. Commiting Changes.
Great! Now all of our inputs are syncing across browsers. Not only that; all of your changes are captured by Gumnut. If you open the Data Index panel, navigate to your projects, and click the Data tab, and open it side-by-side with your app, you'll see all the changes users are making while they're being made.
Gumnut tracks changes to your Document over time as a series of revisions. The pending revision shows all changes made to a document since the last time changes were comitted. You can ask Gumnut to create a Snapshot revision with a timestamp and the contents of the document at that point by calling doc.actions.commit.
This function takes a callback which you can use to submit data to your application. The commit function passes the callback an object whose properties are the changed nodes. If the callback succeeds, Gumnut captures a Snapshot; if it fails, it doesn't.
document.getElementById("save").addEventListener("click", async () => {
  try {
    await gumnutDoc.actions.commit(async (changes) => {
      console.log("Beep Boop, Saving to Your Database:", changes);
    });

    console.log("Document snapshot created");
  } catch (error) {
    console.error("Error saving document", error);
  }
});
Now, each revision shows up in our dashboard as a Snapshot. Neat!
6. Focus & Status.
Gumnut also provides two elements which surface information about the current document: <gumnut-focus> and <gumnut-status>.
When a <gumnut-focus> element is assigned to a node, it shows an icon for each user currently editing that node. You can place a <gumnut-focus> element anywhere on the page, but it typically makes the most sense to place them next to the input bound to the same node.
The way to do this is the following:
<gumnut-focus id="dogNameFocus" />// attach the focus element to the corresponding gumnut node
document.getElementById("dogNameFocus").model = gumnutDoc.root().value("dogName");Finish
Once you've added the focus indicators, it should look like this!
